Freedom from Ads with Pi-Hole and Macvlan

Block Ads to Your Entire Network Using Pi-Hole
Pi-Hole is a fantastic ad-blocking software that can run on a Raspberry Pi or pretty much any other Linux or Windows machine. Most websites that can detect ad-blocking cannot detect Pi_hole and Pi-Hole protects your entire home network. It acts as a personal DNS server which can block advertising or other objectionable sites from your network using blacklists (similar to OpenDNS but completely configurable by you with unlimited whitelists and blacklists). Once it blocks the sites that are on its blacklist, it hands the DNS search off to a secondary DNS (either your ISP’s or one you designate such as Google’s or OpenDNS), thus providing you a second opportunity to filter.

Easiest Install Ever Without Hogging Your Server
There are may how-tos out there on how to install Pi-Hole, but this method provides the following advantages:
- uses Docker to compartmentalize the installation from the rest of the files on your computer,
- stores configuration files on your physical computer rather than in the container,
- grants the Pi-Hole server a separate IP address from the physical computer you are running the container on (this allows you to install other services that would otherwise conflict with Pi-Hole as Pi-Hole tends to listen to all relevant ports).
This post and configuration is based on Tony Lawrence’s setup for synology. It uses the Macvlan network driver to provide the Pi-hole server an IP address separate from the physical computer on which the container is running.
- MacVlan only works with ethernet so your server should be connected to a hard wired connection, and
- As of April, 2020, there is currently a bug with the latest 4.19v7 kernel of Raspbian which will prevent macvlan from working but there is a fix. See the note at the end of this post for more details. As far as I am aware this only has occurred on Raspbian and does not apply to other distros.
Installing Pi-Hole – Easy as Pie
- Install Docker on a Linux computer (I use a Raspberry Pi).
- Install Docker-Compose.
- At the console enter the the following commands to download the docker-compose yaml file:
12345mkdir -p ~/docker/piholecd ~/docker/piholewget -O docker-compose.yaml https://geekvisit.com/wp-content/uploads/2020/04/docker-compose.txt
- Open the docker-compose.yaml file in your favorite text editor and edit as indicated by the #comments to add the IP address you want to assign to the Pi-hole container, as well as other network configurations:
123456789101112131415161718192021222324252627282930313233343536373839404142434445464748495051525354#This is based on http://tonylawrence.com/posts/unix/synology/free-your-synology-ports/version: '2'services:pihole:container_name: piholeimage: pihole/pihole:latesthostname: pihole # <-- container's hostnamedomainname: example.home # <-- domain name of your pihole containergroup_add:- www-datamac_address: e2:09:0e:d4:40:66 # <-- replace with a random mac address,# The above should be something like e2:09:0e:d4:40:66. This is NOT the physical server.# You can use this site to generate a random mac address(pick top number): https://www.hellion.org.uk/cgi-bin/randmac.pl?scope=local&type=unicastcap_add:- NET_ADMINnetworks:pihole_network:ipv4_address: 192.168.0.210 # <-- Replace with an unused ip address on your network to assign to the Pi-hole instance (not ip address of the physical server)dns:- 127.0.0.1- 1.1.1.1 #<-- Replace as secondary DNS - can change to whatever you want, this is Cloudflare- 8.8.8.8 #<-- Replaceports:- 443/tcp- 53/tcp- 53/udp- 67/udp- 80/tcpenvironment:ServerIP: 192.168.0.210 # <-- Revise to match ipv4_address above)VIRTUAL_HOST: pihole.example.home # <-- Revise to match hostname + domainname)WEBPASSWORD: "" # <-- Add password (if required)restart: unless-stoppedvolumes:- ./etc/pihole:/etc/pihole- ./etc/dnsmasq.d:/etc/dnsmasq.d- ./html/pihole:/var/www/html/piholenetworks:pihole_network:driver: macvlandriver_opts:parent: eth0ipam:config:- subnet: 192.168.0.1/24 # <-- Revise 192.168.0.1 to match your gatewaygateway: 192.168.0.1 # <-- Revise 192.168.0.1 to match your gatewayip_range: 192.168.0.211/29 # <-- Revise 192.168.0.X to match Ipv4 address (above) + 1. The 29 is number of ips reserved for DHCP (optional).
- When done editing, save your changes and exit your editor.
- Copy files over from the image (this step should be done automatically by the volume attachment when the image is created by docker-compose but it did not work for me so I’m doing it manually here):
12345678910cd ~/docker/piholemkdir -p ~/docker/pihole/html/piholedocker-compose pullid=$(docker create pihole/pihole)sudo docker cp $id:/var/www/html/pihole ~/docker/pihole/htmldocker rm -v $id
- Now start up the container:
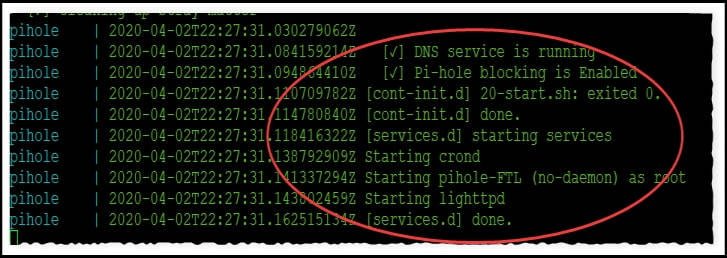
123456docker-compose up -ddocker-compose logs -ftYou can omit the second line if you don’t want to see the logs. If you keep it, when you see “Pi-hold blocking is enabled”, “Starting lighttpd” and “[services.d] done.]” the container is up and running:
You can now can cancel out of the logs by hitting “Ctrl-C”.
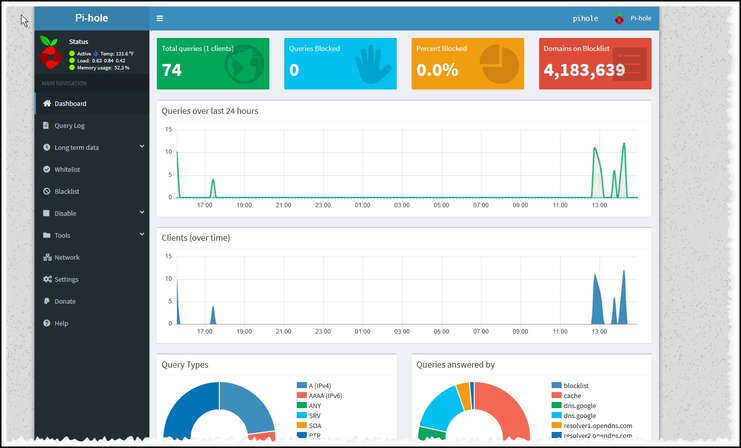
- After a few minutes you will have Pi-Hole up and running. Type the IP4 address you revised on line #23 of the docker-compose.yaml file (e.g., 192.168.0.210), and you should see the following in your browser:

- If you click on the admin link you will see the following:
- Now login to your router, and edit your router settings so that the configured DNS matches the ip address on line #23.
For example, on my router the configuration is as follows:
- It’s now up and running – blocking all ads to all of the computers, phones, tablets, and other devices in your home that are on your internal LAN or Wifi networks (obviously it won’t block cellular data).
- Read the documentation on the Pi-Hole website to configure the various options. The most common configuration changes will be to add certain sites to the whitelist (Pi-Hole has been known to block good web sites or server URL’s that are necessary for some functions like comments). You may also want to add blacklists other than the defaults.
Shutting Down Pi-Hole Using Docker
- Best to disable Pi-Hole in the web admin interface but if you really want to shut down the service type the following at the console:
Keep in mind that wants this shuts down your network will no longer have a DNS service so your internet won’t work. Make sure you edit your router configuration to replace the Pi-Hole ip with the IP address of another DNS service (your ISP’s, Google’s, or OpenDnS for example).123456cd ~/docker/piholedocker-compose downUpdating Pi-Hole Using Docker
- Updating Pi-Hole is easy when it is in a container. At the command line of your Linux server simply issue the following within the ~/docker/pihole directory:
1234docker-compose pull; docker-compose up -d