How to Force Google Safe Search on DD-WRT

Choosing Googles SafeSearch

Try Oone of These Two Methods to Force Google Safe Search

These two methods will enforce Google’s safesearch on all computers on your network (keep in mind that this won’t work for cell phones or other devices using cellular data). This is specific to any router using the DDWRT firmware. DDWRT is an open source firmware that is available to be flashed on a number of routers (check the DDWRT website for a list of compatible routers and installation details)

Method #1 of Forcing Google’s Safe Search – Rewrite DDWRT’s Hosts File on Startup

The simplest way to do this is to have your router edit your hosts file on each startup as follows:

  1. Go to Administration->Commands

    DDWRT Screenshot - administration

  2. Click “Edit” and add the following script:

  3. Click “Run Commands”
  4. Click “Save Startup”
  5. Done!

What does this do ? It redirects those urls to the ip address of forcesafesearch.com. Your hosts file will be wiped out on every reboot of the router but the script will restore the settings.

While this is a very easy way of forcing safesearch, the disadvantage is that Google could change the ip address of safesearch. In addition, this method doesn’t permit wild cards.

Method #2 of Forcing Google SafeSearch- Use DNSMasq

This method permits wildcards:

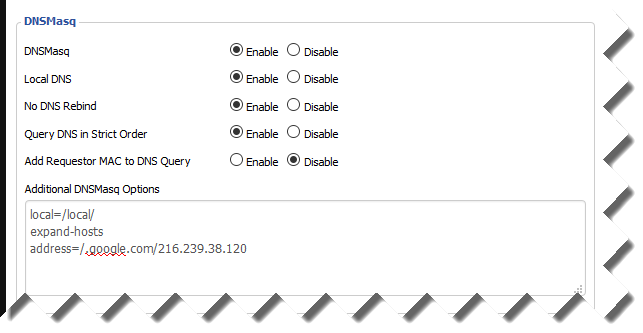
  1. Make sure that you have DNS masq enabled.
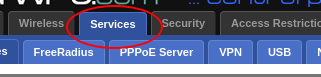
  2. Services->Additional DNSMasq option Box.
  3. DDWRT DNSMasq Option

  4. Insert the following (Note the DOT before google.com, the dot acts as a wild card to pickup any subdomains):
  5. It should look like this:

    DNSMasq Options With Google Safe Search Specified

  6. Click “Save” (button bottom of page)
  7. Click “Apply Settings”
  8. Done! If it doesn’t work right away you may need to reboot the router (use the button on the Services tab)

Port Forwarding Http/Https to Different Computers Within Your Home Network

So you want to have different web servers on your home network that are exposed to the outside world?  How do you do that?  Most web servers listen on the same ports: 80 for non-ssl and port 443 for ssl. If a request comes in for port 80  

Say your home network is setup like this:

Home Network Computers
Router: 192.168.1.1

Your Study: 192.168.1.2 (running your personal wordpress blog )

Wife’s Office: 192.168.1.2 (running your personal wordpress blog)

Living Room Computer: 192.168.1.3 (Running Home Assistant web server)

1. Setup a dynamic DNS service. 

               Go to duckdns.org (super simple) to create a subdomain url for each computer you’d like to access in your internal network from any computer in the world.   I won’t explain it here as the DuckDNS site does a good job.  In my example you would need to set up 3 subdomains for your home network:

Example Dynamic DNS URLs

http://blog.duckdns.org -> your blog in your study

http://wifesblog.duckdns.org -> wife’s blog in her office

http://homey.duckdns.org -> home automation server at

2.  Setup Port Forwarding

                  Normally, if you are outside your home network, say at a coffee shop, and plug “http://homey.duckdns.org” in your browser you most likely will end up either with blank page/unauthorized page or will get the control panel login for your router which is at 192.168.1.1. 

To set-up port forwarding within your home network go into your router (192.168.1.1 in my example) and navigate to the port forwarding section. I use ddwrt so in my home network I would selecte DD-WRT’s NAT/QoS menu selection and set the port forwarding as follows:

Port From (incoming set by url, e.g.: http://blog.duckdns.org:202) Ip Address Port To (This is port server is listening on)
80 192.168.1.1 804 (fake port, nothing is listening here)
202 192.168.1.2 80
203 192.168.1.3 80
204 192.168.1.4 8123

Here’s a screen shot of my example setup:

 
Once Saved, you access your sites as follows:

URL -> Server

http://blog.duckdns.org:202 -> your blog in your study at 192.168.1.2 port 80

http://wifesblog.duckdns.org:203 -> wife’s blog in her office at 192.168.1.3 port 80

http://homey.duckdns.org:204 -> home automation server at 192.168.1.4 port 8123

If someone leaves the port out (http://blog.duckdns.org) it would just go to a blank page because it would be forwarded to 192.168.1.1:804  which is a fake port with nothing listening.

In actual practice you should use SSL for each of these,but for simplicity of explanation I’ve left that out. However, it would work the same way. You would turn off port 80 on each of the servers, and substitue 443 for 80 above, with an additional fake port for 443, such as the following:

Port From (incoming set by url, e.g.: http://blog.duckdns.org:202) Ip Address Port To (This is port server is listening on)
443 192.168.1.1 804 (fake port, nothing is listening here)
202 192.168.1.2 443
203 192.168.1.3 443
204 192.168.1.4 8123


Also, if you’re using ssl you’ll need to set up ssl certificates (use LetsEncryptfor free ssl certifices)

As a final note, you could have all of these sites on one computer (personally I’m doing this on Raspberry Pi 3 using lighttpd and homeassistent), but you would have to change the default  listening ports on each server that is running. For example, instead of your blog’s server software listening to 443, you would have the ssl port listen to say 452.   Likewise, your wife’s ssl port would listen to say 574, etc. .