Is Your DNS Using Your Local Configuration or the Router ?


What DNS Server am I using
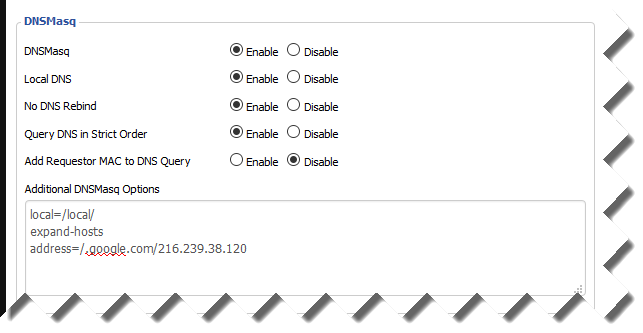
I’ve setup Pihole recently which is an in-network DNS server which is designed to block ads by screening DNS requests against blacklists. I’ve set it up on a Raspberry Pi in a docker container. The IP address shows up as an internal ip address (say 192.168.1.198). My router than specifies that the DNS server should be 192.168.1.198. Any device on the network that specifies the router as its DNS server (or if network settings are set to automatic) then uses Pi Hole as its DNS server.
The problem with DNS is that it can be specified locally through a computer’s configuration files (e.g., in Windows using the Network Adapter property settings, or in Linux using the /etc/resolv.conf file) or as mentioned, on the network level through the router. That can lead to confusion as to what DNS you are using.
How do you know which nameserver your computer is using to get a particular address ? You could rely on looking at your configuration files, but a better way is using the nslookup tool in Linux.
NSLookup to the Rescue
|
1 2 3 4 5 6 7 8 9 10 11 |
nslookup google.com |
That results in something like this showing that the request is using the router for its lookup:
|
1 2 3 4 5 6 7 8 9 10 11 12 13 14 15 16 17 18 |
Server: 192.168.1.1 Address: 192.168.1.1 Non-authoritative answer: Name: google.com Address: 216.58.193.142 Name: google.com Address: 2607:f8b0:4000:816::200e |
Resolve.conf
If I edit /etc/resolv.conf and specified google’s name servers I get:
|
1 2 3 4 5 6 7 8 9 10 11 12 13 14 15 16 17 18 |
Server: 8.8.8.8 Address: 8.8.8.8#53 Non-authoritative answer: Name: google.com Address: 172.217.1.238 Name: google.com Address: 2607:f8b0:4000:816::200e |
Simple, but very helpful when diagnosing problems.